Pages

Showing posts with label DIY. Show all posts

Tuesday, 13 August 2013

DIY Crochet Pot Cover

Happy Daisy Crochet DIY Tutorial Flower Pot
My parents gave me a little lavender plant when they visited last week and it's had pride of place on my living room window sill ever since. I wanted to change up the black plastic pot it's planted in and as all my available pots are too small, I thought I'd crochet a little slip cover to hide the black and help it blend in with my living room a little better.
Happy Daisy Crochet DIY Tutorial Flower Pot
If you want to make your own, it's really easy. All you need is the pot you want to cover, a ball of yarn - I used an aran weight wool blend and a crochet hook. My crochet tension is pretty loose, so I used a 3.5mm hook - you might find you need a bigger one. 
Happy Daisy Crochet DIY Tutorial Flower Pot
Crochet a foundation chain that's just big enough to go around the circumference of the base of your pot. It'll stretch as you go and you don't want it to be too loose or it won't fit snuggly around the pot. The base of my flower pot measured 12cm (5inches) in diameter and I used 62 stitches.
Slip stitch in first chain to form a circle. 
Happy Daisy Crochet DIY Tutorial Flower Pot

Chain 3 - this counts as the first stitch, then Treble Crochet (US Double Crochet) into the top of each chain stitch, slip stitching into the the 3rd chain of the first 'treble' stitch to complete the round. 
Repeat this row until your work is tall enough to cover your pot - for me, that took 10 rounds. Bind off and weave in your ends, then slip your cover onto your pot. Simple and effective. 
Happy Daisy Crochet DIY Tutorial Flower Pot
I think this would add a nice handmade touch to a gifted plant.

Crafts and gardening! What more could a girl need?! ;)
A ♥

Saturday, 10 August 2013

DIY Crochet Edged Lampshade

Happy Daisy DIY tutorial Lampshade Crochet Edging
I'm not a big fan of overhead lighting - give me fairylights and table lamps any day of the week! I picked up these ceramic blue lamp bases from a second hand shop last summer and the shades are super cheap ones from Wilkinsons - making them a bit more 'me' has been on my to do list for a while. Today I'm going to share how to add a scalloped crochet edge to your own lacklustre lampshade.

You will need:
A lampshade.
A crochet hook - I used a 2mm.
Yarn - I doubled up a strand of hand dyed wool, with a strand of cotton yarn.
A sewing needle - sharp enough to pierce holes in your lampshade, with an eye big enough for your yarn to fit through.

Happy Daisy DIY tutorial Lampshade Crochet Edging
First, you will need to blanket stitch all the way around the edge of your lampshade. Blanket stitch is a really simple embroidery stitch that's really useful to know.

Cut a long length of yarn - it's irritating to have to join new threads when you're blanket stitching. Insert your needle into your lampshade, front-to-back, leaving a tail that you'll weave in later. Instead of making the next hole working through from the back, as you would a running stitch, bring your needle back to the front of the lampshade, pushing it through front-to-back again. Before pulling the stitch tight, bring your needle back through the loop you've just created. Repeat until you get all the way around your shade. Knot your two end threads - you'll crochet over them, securing in the ends.

Happy Daisy DIY tutorial Lampshade Crochet Edging
I chose a simple little scallop edge for my lampshade, working into the blanket stitch, as you would a foundation chain.
In UK crochet terms: Double crochet into first blanket stitch loop, half treble, treble crochet, half treble, double crochet. Repeat in each stitch loop until all loops have been worked and join with a slip stitch.

In US crochet terms: Single crochet into first blanket stitch loop, half double, double crochet, half double, single crochet. Repeat until all loops have been worked and join with a slip stitch.
Happy Daisy DIY tutorial Lampshade Crochet Edging
There you have it, a much prettier lampshade!
I think I'll choose a different colour yarn for my second shade, maybe a coral pink…

Have a lovely weekend!
A ♥

Tuesday, 9 July 2013

DIY Hand Stamped Cushion Cover...

Happy Daisy Hobzy Blog Amy Edwards Green DIY

I just wanted to stop by and let you know that I'm guest posting over on the Hobzy Blog today. If you're not familiar with Hobzy, it's a networking site for crafters, makers and artists to share their hobbies, get feedback from others and sell their makes.
Happy Daisy Amy Edwards Green Hobzy Blog DIY tutorial
If you pop by their blog today, you can find out how to make a hand stamped, simple sew cushion cover, just like the one that's now adorning the rocking chair in my flat.

I've managed to escape the still heat of South London this week, in favour of sea air on the Sussex coast, so if it's a little quieter around here, that's because I'm at the beach ;)

♥ A

Sunday, 16 June 2013

Knitting Adventures: Acid Dyeing DIY

Happy Daisy DIY Knitting Adventures Yarn Dyeing
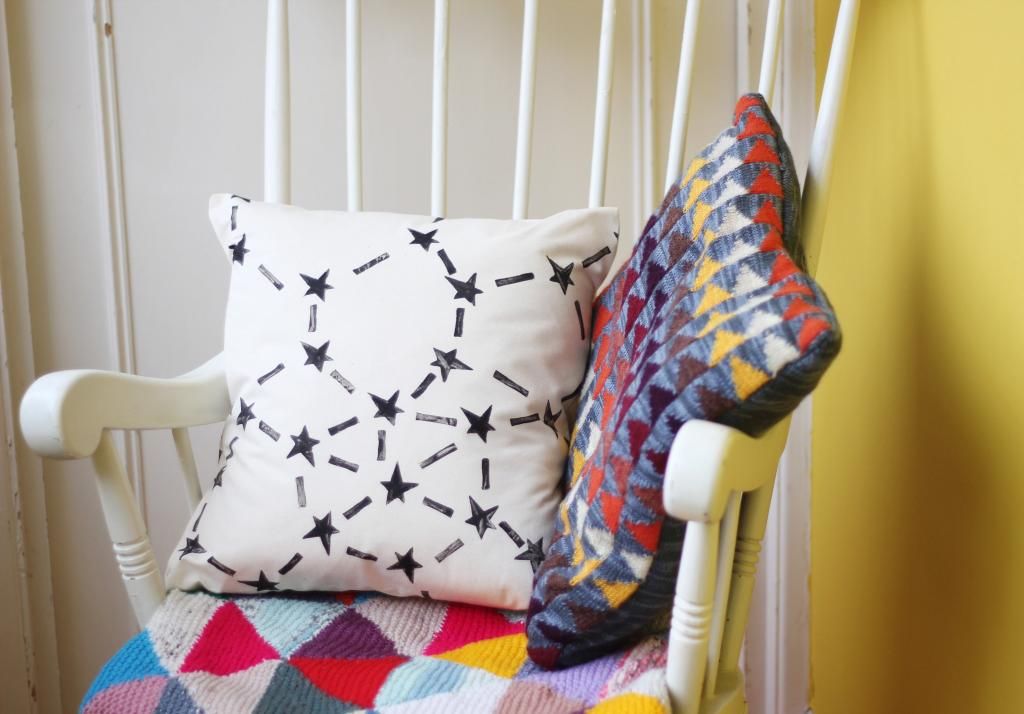
I love dyeing. Yarn dyeing, tie-dyeing, hair dyeing, you name it, I'll try and change the colour of it. Normally I dye my yarn with Kool-Aid - you can see some of the results of that here and here. Kool-Aid is fun for creating variegated or 'hand painted' effect yarn, but I wanted to try a dye that I could use to create an all over even colour. Also, Kool-Aid is pretty hard to come by in the UK and you have to use a fair bit to dye 100g balls of yarn vibrant shades.

I want to share my experience with acid dyeing - this little how-to is for the Stove Top Immersion Technique.

Happy Daisy DIY Knitting Adventures Yarn Dyeing
You will need: 
Acid dye - I used Easifix AllinOne - it comes in a wide range of colours, is relatively expensive and you don't need to add a fixative.
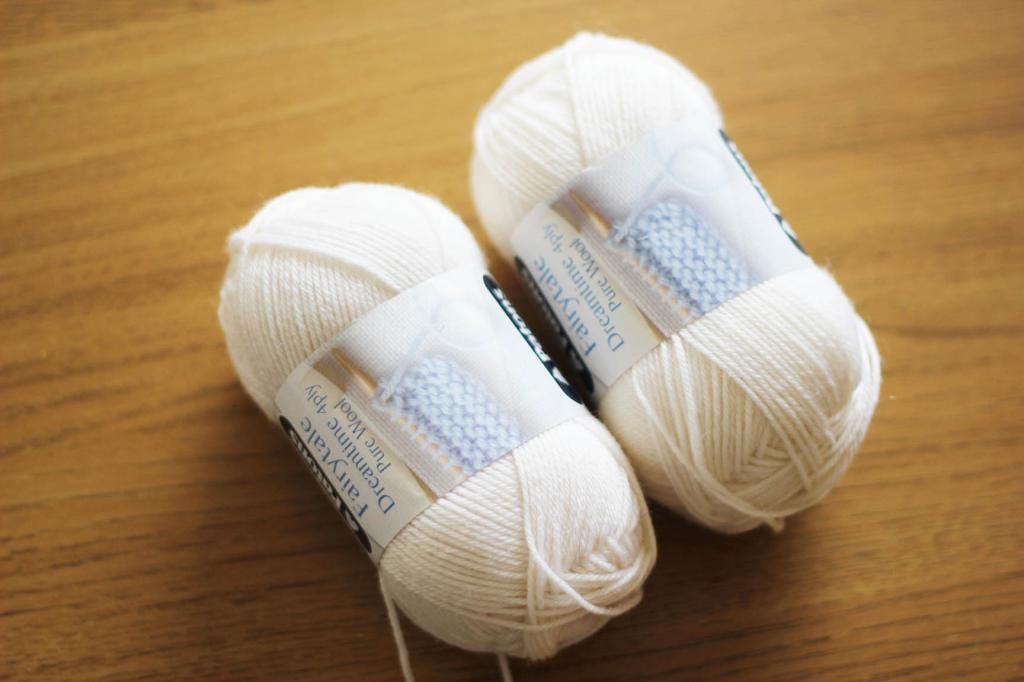
Yarn for dyeing - Acid dyes dye protein fibre - so you want yarn that's 100% wool, or a combination of wool and silk or alpaca or mohair etc not acrylic or polyester - avoid cotton too, stick to animal fibers.
A vessel for dyeing in - This needs to go on the stove, so stainless steel or enamel saucepans work well.
A jug - For mixing the dye in.
A spoon - Stainless steel or plastic is fine, wooden spoons may hold the dye.
Protective gloves - Latex or rubber gloves will work fine. I didn't have any problems with the dye staining my skin, but I didn't really stick my hands in it, either! 
Happy Daisy DIY Knitting Adventures Yarn Dyeing
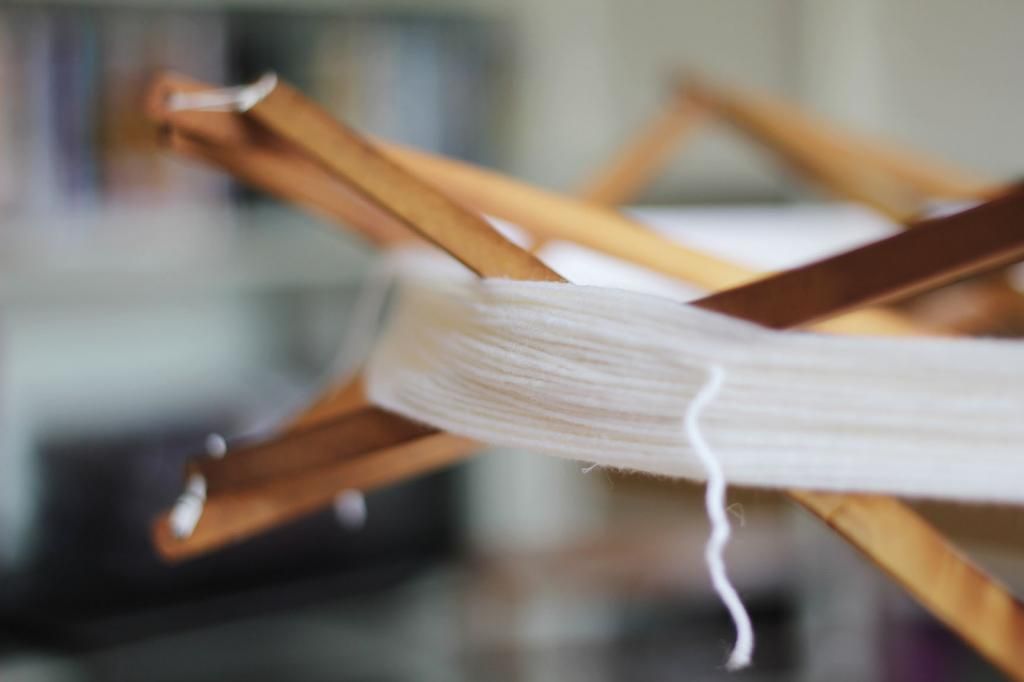
First up, preparing your yarn. You can't just stick a ball of yarn in a dye bucket and expect it to work wonders - you need to wind it into a hank. If you don't have access to a yarn swift, the back of chair works perfectly. Unwind your yarn and as you go, wrap it round and round either your swift, or chair back, until the ball is no more.
Happy Daisy DIY Knitting Adventures Yarn Dyeing
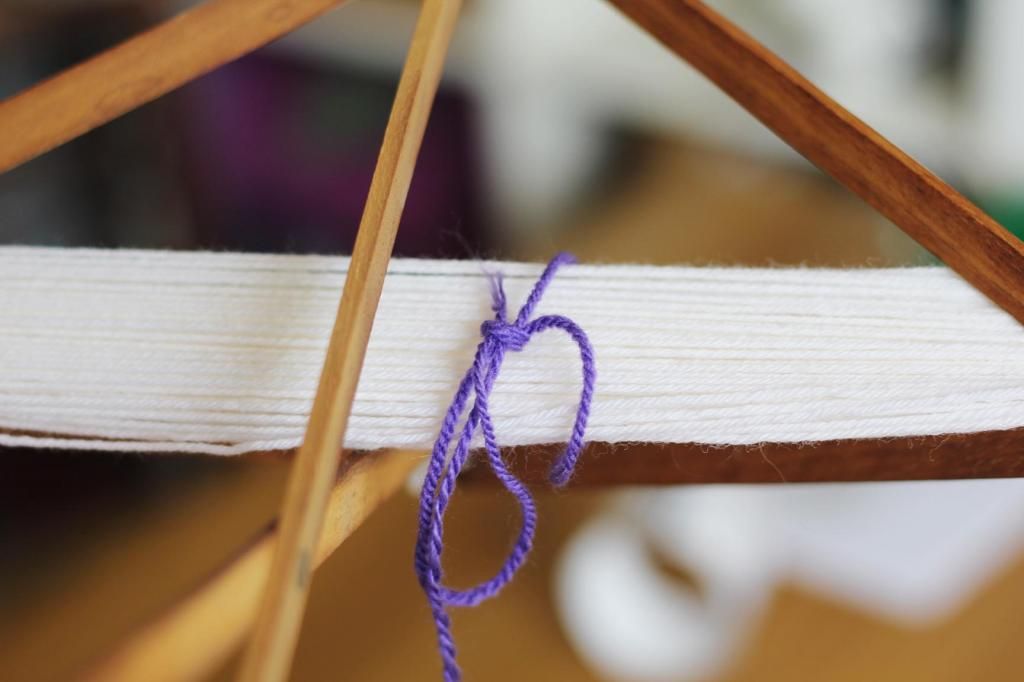
Tie it up - you don't want it to turn into a stringy, seaweedy mass in your dye bath, you want to knit with it afterwards, so make sure to tie up your yarn before removing it from your swift or chair back. Some people use two ties, but I play it safe and use three or four. I tend to use acrylic yarn in a contrasting colour - so it's easy to see when you want to untie it later.
Note: Don't tie it too tight - ideally, your ties should be pretty slack, you don't want tie-dye effect stripes on your yarn.
Happy Daisy DIY Knitting Adventures Yarn Dyeing
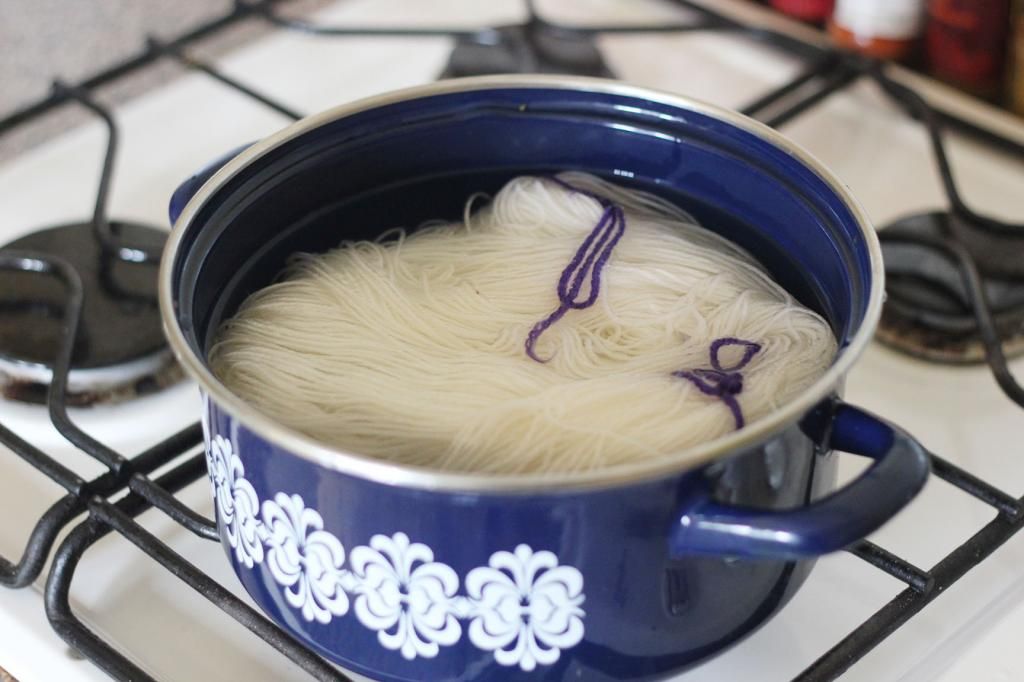
In order for your yarn to absorb the dye properly, it needs to be soaked in water until it's completely saturated. Remember - yarn will felt if shocked with hot or cold water, so run lukewarm water into a container and fully immerse your yarn. I used my dye vessel to do this in, and when fully soaked I transferred it straight to the stove top.
Happy Daisy DIY Knitting Adventures Yarn Dyeing
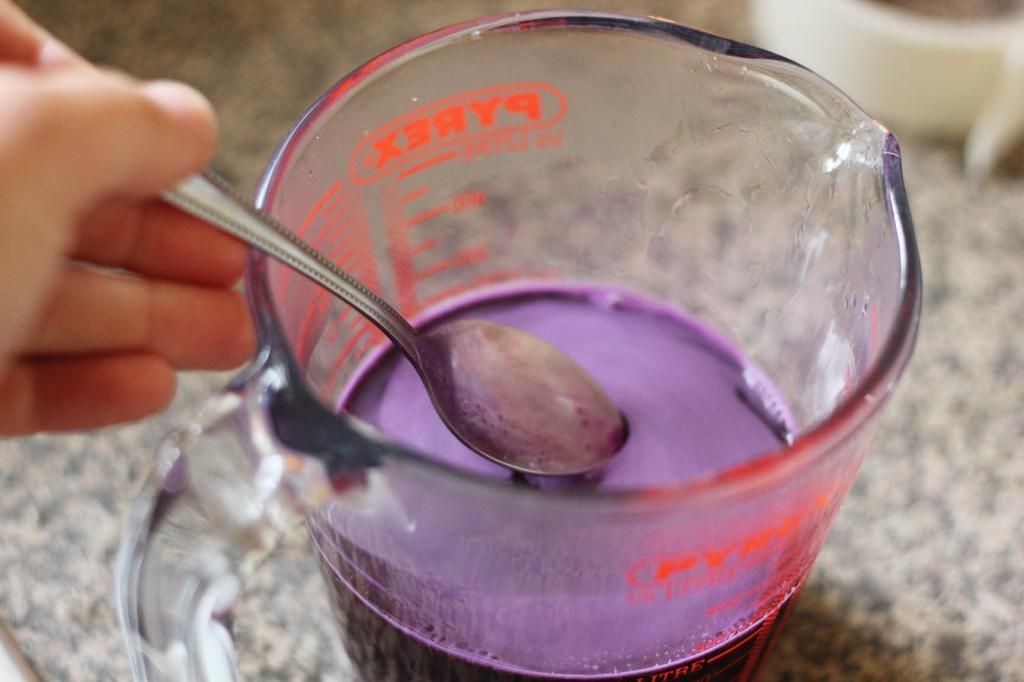
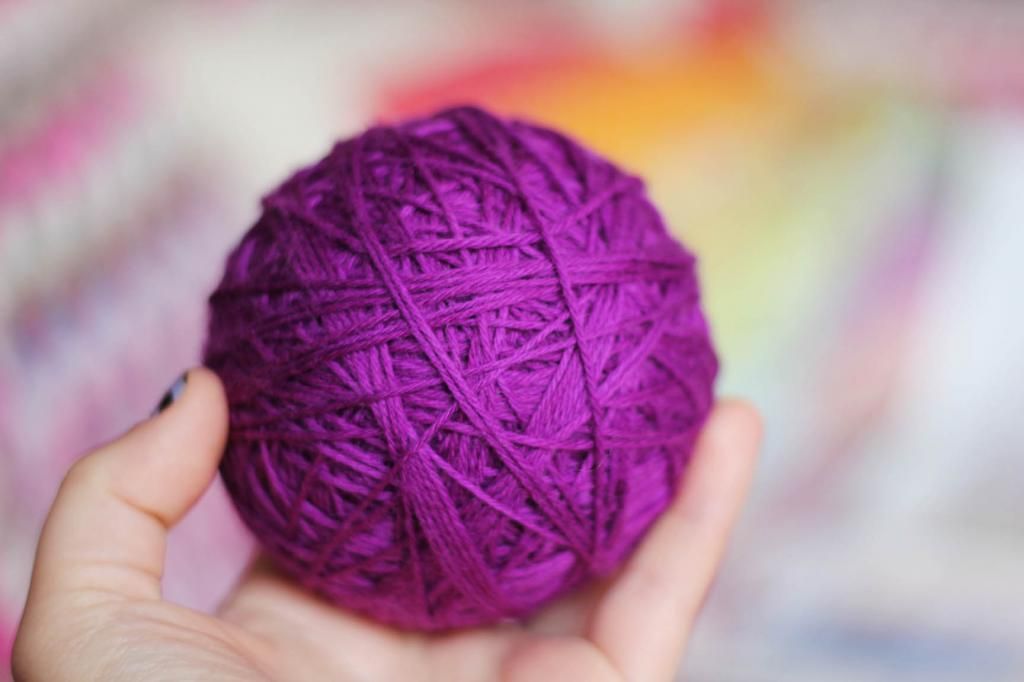
With your yarn in it's vessel, on the stove top and all ready to go, turn on your stove to the lowest temperature and allow the water to heat up gradually - again, you don't want your yarn to felt and acid dyes work at high temperatures, so gradual is best. Meanwhile, mix up your chosen dye colour in your jug. The general rule of thumb is 10% of the dry weight of your yarn, will give you the amount of dye to use. I'm dyeing 100g, so in order to get the brightest shade possible, I should use 10g of dye. However, I chose to use 5g of dye - and still achieved a bright shade of purple.
Dissolve your dye with hot water - I used around a quarter of a litre. If you're using a dye that requires a fixative, now is the time to add that fixative (it's usually vinegar, but best to check your dyeing instructions).
Happy Daisy DIY Knitting Adventures Yarn Dyeing
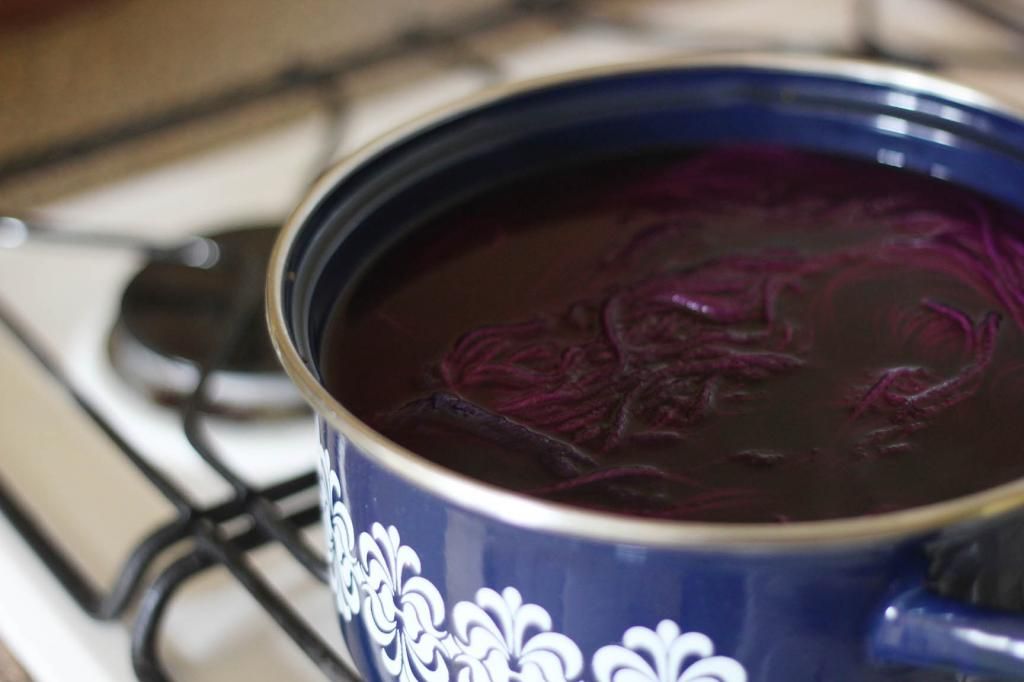
Add the dye to your simmering pan of yarn - I was initially worried that I'd get darker patches on the yarn by doing it this way, but after stirring it, I had no problems at all. If you're worried you could always heat two pans of water to the same temperature - one with your yarn and a second one to add the dye to, before transferring your yarn over.

Let it simmer but not boil for 20-40 minutes, then remove from the heat and leave to cool - again, important to stop felting occurring. When cool, empty out the water, you'll notice the water is clear, rather than coloured. Gently squeeze excess water from your yarn, but do not wring, then leave to drip dry, either on your washing line, or over the bath tub.
Happy Daisy DIY Knitting Adventures Yarn Dyeing
When completely dry, you'll need to wind it into a ball - using the same technique as for unwinding it earlier, pop the hank on your swift or chair back, slowly unravel and roll into a ball, or you can use a ball winder.

And there you have it, hand dyed yarn, all ready to knit with!

Additional Notes: 

- Acid dye is not highly acidic. They have a neutral ph similar to water, the term 'acidic' refers to the acid salt used as a fixative, which have a mildly acidic ph, similar to vinegar and citric acid.
- The dyes are non toxic when used properly, follow the safety instructions that come with your dye.
- If you're dyeing yarn black, you will need double the quantity of dye - 20% of the dry weight of your yarn, to ensure you get a deep colour.

It's a really fun process, I'm looking forward to mixing up my own shades and dyeing all the neutral coloured yarn I can lay my hands on.

A ♥

Saturday, 18 May 2013

DIY Stamped Notebook Cover

Happy Daisy Notebook DIY Hand stamped tutorial
Last night I hand stamped some polka dot canvas - and today, instead of doing schoolwork, I decided I it would make a pretty cover for my notebook.   
Happy Daisy Notebook DIY Hand stamped tutorial
Hand stamping is such an easy way of patterning fabric, these polka dots are the result of fabric paint and the eraser end of pencil. 
Happy Daisy Notebook DIY Hand stamped tutorial
You'll Need:
A notebook, fabric, Mod Podge, paintbrush, fabric scissors, and (not pictured) clothes pegs or bulldog clips.
Happy Daisy Notebook DIY Hand stamped tutorial
Coat the cover of your notebook with a generous layer of Mod Podge.
Happy Daisy Notebook DIY Hand stamped tutorial
Wrap your chosen fabric around your notebook - I cut two slits into the canvas, so I continue to use the elastic strap on my moleskine.
Happy Daisy Notebook DIY Hand stamped tutorial
Use clothes pegs or bulldog clips to hold the fabric in place while it dries.
When dry, trim the edges of the fabric up to the notebook cover.
Tip: dip the edges of the book cover into Mod Podge to prevent fraying.
Happy Daisy Notebook DIY Hand stamped tutorial
Done! I'm going to use leftover fabric for a mending project I've been putting off for ages - canvas is really versatile!

Have a lovely weekend!
A ♥

Wednesday, 2 May 2012

Make It Yourself: Peg Magnets

Happy Daisy DIY
This doesn't really classify as a DIY, as it's so simple! But I was really pleased with how it turned out, so I thought I'd share anyway, even if it is pretty self explanatory, they might inspire you to organise your fridge door!
Happy Daisy DIY
You will need: 
Wooden clothes pegs,
Acrylic paint,
Letter stamps and an ink pad (you could handwrite your labels if you prefer),
Magnets - I used self adhesive magnetic tape, cut into strips, it's thin, therefore the pegs sit pretty flush to the fridge.
Happy Daisy DIY
Happy Daisy DIY
Happy Daisy DIY
Happy Daisy DIY
Happy Daisy DIY
I'm thinking of making one for each of my family members, so we can write lists and notes for each other.
A ♥


Monday, 16 April 2012

Frosted Lantern DIY

Happy Daisy DIY Frosted Jam Jar Lanterns
These frosted lanterns are probably my favourite use for recycled jam-jars! They're so simple to make and look really effective - great for adding a little extra glow to a springtime evening.
Happy Daisy Jam Jar Lantern DIY Frosted Mod Podge
You Will Need: 
Jars (large enough to hold tea light candles),
Tissue Paper,
Matt Mod Podge,
Wire,
Scissors, a paintbrush and wire cutters (if your wire is too thick to be cut with scissors).
Optional - beads, for threading on to the handle. 
Happy Daisy Jam Jar Lantern DIY Frosted Mod Podge
Cut out tissue paper shapes.
Happy Daisy Jam Jar Lantern DIY Frosted Mod Podge
Apply a thin layer of Matte Mod Podge to your jar, pasting down your shapes and covering the glass, this creates a lovely frosted effect.
Happy Daisy Jam Jar Lantern DIY Frosted Mod Podge
Wind a length of wire around the neck of the jar - the jar's thread will keep it in place, and twist to create the base of one side of the handle. 
Happy Daisy Jam Jar Lantern DIY Frosted Mod Podge
Optional - thread several beads on to the wire before attaching the other side of the handle to the wire around the neck of the jar. The beads hide the twisted wire fastening nicely.
Happy Daisy Jam Jar Lantern DIY Frosted Mod Podge
Add tea lights and hang!

I think I might make some Union Jack versions of these for the Diamond Jubilee... Goodness knows I have enough jam jars to use up! Haha. A ♥

Sunday, 18 March 2012

DIY: Make your own stamps.

Happy Daisy DIY Stamps Make your own tutorial
Stamping is such a quick and easy way of decorating things - I've been using stamps a lot recently, but fancy rubber stamps can be pretty expensive, so here's a simple how-to to make your own! 
Happy Daisy DIY Stamps Make your own tutorial
You will need:
A sheet of craft foam - available at most craft stores for under a pound.
A marker pen.
Scissors.
Cardboard - standard cardboard-box card is perfect.
Double sided foam tape - you can also use double sided foam pads / dots (normally used for creating 3-D effects in card making) or a strong glue.
For the stamping part, you will need ink/paint and a surface to stamp on! 
Happy Daisy DIY Stamps Make your own tutorial
Draw your chosen shape out on your foam sheet (simple shapes work well for repeating patterns).
Happy Daisy DIY Stamps Make your own tutorial
Cut out. 
Happy Daisy DIY Stamps Make your own tutorial
If you're using foam tape, cut small pieces and stick to the back of your shape, the same process goes for foam dots - it's just to make the shape stand out more from the cardboard backing. If you haven't got either of those, not to worry, glue your shape back onto your foam sheet, wait for it to dry, then cut out. 
Happy Daisy DIY Stamps Make your own tutorial
Stick to a cardboard backing.
You don't have to use cardboard, anything vaguely rigid would do it, I just happen to have a big stash of cardboard! 
Happy Daisy DIY Stamps Make your own tutorial
Apply your paint or ink - if you're new to stamping, a little goes a long way! 
Happy Daisy DIY Stamps Make your own tutorial
Stamp till your heart's content!
Happy Daisy DIY Stamps Make your own tutorial
I added some glittery heart accents to this sheet of wrapping paper I was creating, because I am a glitter fiend! ;)

There you have it - super straight forward, a perfect way to try out stamping without spending a fortune! I made my own alphabet stamps last week (which was a nightmare - I stuck them all on backwards and had to redo them! There's a lesson to be learned there!) and they've come in so handy! see them in action here

Happy Sunday! And also Happy Mother's Day! A ♥
Related Posts Plugin for WordPress, Blogger...